Classes and Skills
Overview
Human (and the Forsaken and the Pure) characters belong to one of seven different classes of soldiers:  Assault,
  Heavy,
  Sniper,
  Berserker,
  Infiltrator,
  Technician or
  Priest.
Each class has seven levels, each of them corresponding to a Skill, including a starting skill that defines the character as belonging to that particular class, and a 4th level skill that enables dual classing (so there really are 5 unique skills to acquire in each class). For a complete description and commentary on the class skills, see below.
Each operative can also unlock 3 random personal perks (often called third-row skills, because of their location on the character sheet).
Among these the perks providing buffs to damage are particularly important - that is:  Bombardier,
  Close Quarters Specialist,
  Self Defense Specialist,
  Sniperist,
  Strongman,
 Trooper and
  Reckless
 Assault
- Proficient with assault rifles and shotguns (complete list here)
As with all classes in Phoenix Point, the role of the operative depends on how you build it. Some of the skills are compatible with a support role ( ,
,  ), others are better suited for the offense (
 ,
, ), and
  is something that you wish all your operatives had regardless of their role or class.
It is very common to multiclass other classes into to take advantage of and .
 Dash (cost 3WPs and 1AP) move up to 1/2 of the Speed attribute of the character (e.g. with a Speed of 20, a soldier can move 10 tiles casting Dash), limited to 2 uses per turn.
Useful whenever you want to move 2 APs at the cost of one and you are willing to pay 3WPs for it, which happens very often (in fact, too much, as you can be tempted to cast it multiple times, e.g. to attack a faraway enemy, neglecting good positioning, exposing your soldier to retaliation and unnecessarily depleting its WPs).
Often used to get close to an enemy, attack it, and get back to safety.
Also useful in conjunction with to assist another operative.
How to achieve extreme mobility (and kinda break the game):
The max speed attribute is 20. Some armors and augmentations provide a bonus to Speed; a combination of the  Acolyte Body Armor and Agile Legs mutation provides a bonus of +7. The
  Quarterback perk adds 2 to Speed. Casting
  Frenzy (using the Judgement Head Priest mutation) provides a +50%.
  Bloodlust (LVL5 Berserker passive skill, increases the damage and speed up to 50% in proportion to damage suffered) can provide an additional +50%.
Thus, a soldier’s Speed can be increased to 58, while most maps in Phoenix Point are 48 tiles in length, a single (29 tiles) allowing the soldier to move half the map at the cost of 1 AP and 3 WP.
 Return Fire (passive skill) shoot back at an enemy when it attacks, providing that soldier is using a direct-fire projectile weapon with proficiency, and the enemy is within half perception range.
Does not activate on melee attacks
Does not activate if the soldier is on Overwatch, unless the Overwatch is activated immediately before the attack (for example, if an enemy runs into the Overwatch cone, setting it off, and then the same enemy or a different one attacks the operative)
Does not activate if the soldier is  dazed
dazed
For purposes of calculating the perception range, the stealth stat of the attacker is taken into account. So if the attacking enemy has a stealth of 50%, and the operative has a perception of 35, will not activate unless the enemy is within 8 tiles of the operative.
When attacking an enemy with the , usually if it will be activated when attacked you should see this image missing pic in the top right hand corner of its icon. However, if you are attacking from behind high cover, requiring stepping out of cover to shoot, you will not see this icon but the enemy's will activate if attacked provided the rest of the conditions are met.
 Ready for Action (passive skill) reloading and inventory management costs 0 AP
This is useful for moving grenades from the backpack to the quick inventory slots. With high strength,  Boom Blast and
  Quarterback trait the operative can throw up to 4 grenades in a single turn (without taking into account AP refund skills, and ) at a range of nearly [40? check] tiles, essentially acting like ultra-precise artillery.
It can also be used for equipment sharing in the field: by positioning the operative with in the middle of a group of soldiers, it is possible to move items between them and to reload their weapons for free. This is useful when, for example, attempting to paralyze a large Pandoran when you only have a single  Hera (and plenty of ammo for it)
 Onslaught (cost 4WPs and 2APs) refunds 2APs to another operative within 12 tiles, can only be used once per turn by the same soldier
Although no APs are generated, but merely transferred from one operative to another, this is a very useful skill as very often an operative low on APs can make a better use of them than the . For example, this can be used to allow a to get into position using the jet jump missing pic and then fire the main weapon.
Can be used several times by different operatives on the same soldier (this is known as 'Cheerleading'), for example to maximise the utility of Boom Blast, or  Adrenaline Rush, or run around the map taking advantage of extreme mobility.
 Rapid Clearance (cost 5WPs), get back 2 APs for each kill.
This is perhaps one of the most abused skills in Phoenix Point and the most common ingredient in the 'Terminator Builds'.
If, once activated, the operative can consistently kill for 2 APs or less, he can clear large chunks, or entire maps of enemies on the first turn before they even had a chance to move.
Several things have to come together for this, but it's very easy for it to happen if you keep stacking buffs as the game encourages you to:
1) you need to maximize damage, which in the game you can currently do up to +>200%:
+100% from  Sneak Attack,
+50% from Bloodlust (maximum)
+20%-25% from one of the weapon proficiency personal perks (, , , , or ), +20% from Reckless
+10% from Vivisection research
+10 damage per attack from  Mark for Death
+ 50% from  brawler if attacking with a melee weapon
2) you might need to reduce the AP cost of firing the weapon, which you can do with
 Quick Aim, Boom Blast or Adrenaline Rush.
3) you need to deliver the damage to your helpless victims ... errh, I mean the awful, terrible, dangerous, and scary Pandorans! This can be easily done using a fraction of the extreme mobility that you can currently achieve in the game.
And you can have up to 8 soldiers on most missions so they can soften enemies for each other and cast Onslaught to keep the killer loops going.
The most effective and well-known abuse of is casting it by a / with Strongman equipped with a  Deceptor benefitting from extreme mobility and casting Adrenaline Rush afterward.
However, even something as basic as an with the Self Defense Specialist perk (and a  Gorgon Eye-A) can do obscene amounts of damage and keep recovering APs with each kill.
 Heavy
Heavy
- Proficient with machine guns, cannons and grenade launchers (see complete list here)
As always, remember that in Phoenix Point classes don't dictate roles. This can be a fast, lightly armored, hard hitting melee fighter, a tank, a dedicated shooter, a crowd controller, a long range artillery piece, etc.: a will be what you build it to be.
Some things to bear in mind before we look at the skills:
- They are notoriously inaccurate when fully clad in heavy armor (that inflicts a 30% penalty on their accuracy), wielding a  Hel 2 Cannon or a
  Deceptor (which have short effective range) and targeting small or medium sized enemies at anything more than 5-10 tiles.
However, the advantage of heavy weapons is that they pack such a punch that it doesn't matter where they hit their targets, which means that often they can engage them at the same range as with their assault rifles, which do have to target specific body parts when dealing with armored enemies.
- If you invest enough in Strength, they can easily one-bash kill most Arthrons and Tritons, or at least daze them (see melee; in summary, bashing scales with Strength of the character and weight of the weapon, so a with, e.g. 20 Strength, wielding a Hel 2 Cannon will do 20*5 = 100 damage, with +50%, so 150 damage; with 30 Strength it goes up to 225).
- With the  Jet Jump ability, they can move 20 tiles for 3 APs and 2 WPs. Therefore they can neglect Speed and Willpower in favor of Strength, which gives them more HPs and increases their throwing distance and the damage they do with bash missing pic.
They are the only operatives capable of using the jet jump ability of the heavy body armor without a chance to [missing anchor fumble]
- The mounted weapons proficiency allows them to use  Destiny III, which has an effective range of 999 (i.e. it's 100% accurate at any distance) and shoots 3 projectiles that do 80 damage each for only 1 AP, easily outperforming any sniper rifle.
 Brawler (passive skill) Bash and melee attacks deal 50% more damage.
This is a must have skill for a melee oriented , very effective in combination with jet jump.
It can also be used in a multiclass build with an with the vengeance torso to create a melee 'Terminator'.
 War Cry (3WPs 1AP) limits the APs of all enemies within 10 tiles to 2.
In practice what this does is prevent most of the enemies affected by  from attacking you on their turn. This is because usually they want to move before shooting, and with just 2 APs they can't do that. Some enemies will never attack at all because they need 3APs for that (Chirons indirect fire, for example).
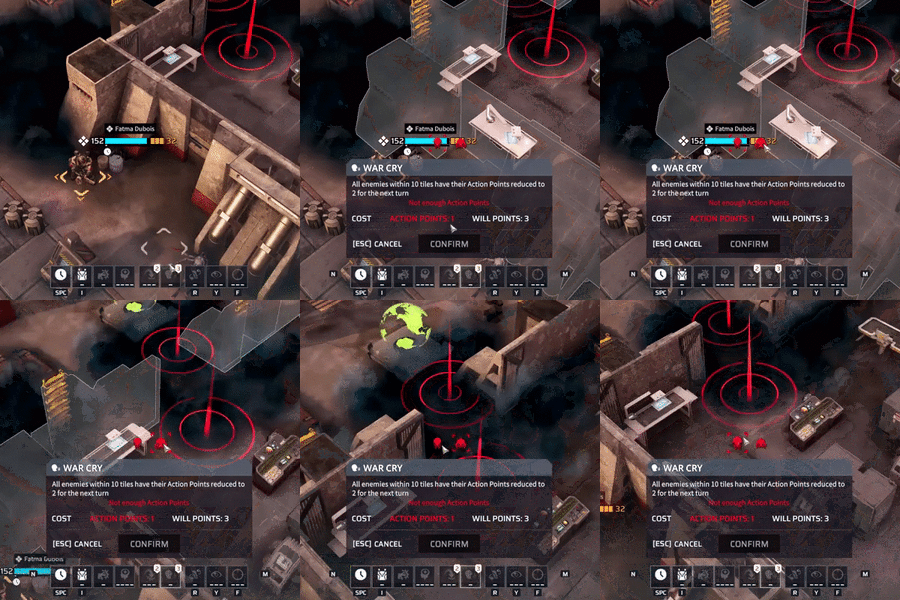
 Boom Blast (5WPs), reduces the cost of using explosives by 1 AP and increases their range by 50% until the end of the turn.
Also works with  Destiny III and
  Archangel RL1
This skill allows launching 2 grenades from the  Goliath 2 Grenade Launcher and a mounted rocket. (or four grenades and a rocket using Ready for Action
There are third-row skills that make these attacks even more effective ( Strongman for a grenade launcher, Bombardier for rockets, and Reckless for both)
And you can cross a and an Infiltrator and top the whole thing off with another +100% to damage from Sneak Attack
 Inspire (passive) Killing an enemy grants allies 1 additional will point
This is very useful to replenish the will points of the other operatives in the squad by killing small enemies such as worms, eggs and mindfraggers, especially when using AoE attacks against them.
Note that it doesn't grant the additional will point to the
 Rage Burst (5WPs + standard AP cost of firing the weapon), fire the weapon 5 times in an arc, limited to one use per turn by the same soldier.
What this skill offers is shooting the target multiple times for the same AP cost, but without being able to freeaim and expending excess ammunition.
Though you aim with a cone, you actually have to select a target (as you move the cone, once it locks onto an enemy you will see a red square under it and the cone will start swaying, following the idle animation of the critter).
It doesn't work against multiple targets unless they are *very* closely packed together.
It works best against very large targets (such as  Scylla), and using burst weapons (such as the Deceptor or any assault rifle or personal defense weapon).
Beware of obstacles between you and the target, as some scenery pieces are surprisingly resilient (or indestructible).
 Sniper
- Proficient with sniper rifles and pistols (see complete list here).
Everyone likes sniper rifles because of their high accuracy and high damage per shot. It's an easy package for reliably overcoming armor at long distances.
Snipers skills make it even better with cheaper Overwatch (Focus) and cheaper direct fire (Quick Aim), even higher accuracy when there are no enemies nearby (Marksman), removal of armor from the body part that gets disabled (Weakspot) and a damage multiplier spell (Marked for Death).
Now, I'm not crazy about sniper rifles. Their damage per AP is the lowest of all types of weapons and they don't shred armor. However, the Sniper skills are useful with other weapons, whether through multiclassing or third-row weapon proficiency. Below some comments and ideas on a couple of them:
 Extreme Focus (passive) Overwatch cost is reduced by 1 action point
It can reduce the cost of Overwatch to 0 AP if the weapon only costs 1 AP to shoot, so it is very common to use this skill to setup a free Overwatch with a handgun. Alternatively, it can be used to set up Overwatch with a sniper rifle after making a shot with it using
 Quick Aim (3WPs) The AP cost of the next shot with proficient weapon is reduced by 1
The most common use of this skill is to shoot a sniper rifle twice in a single turn, but of course it offers interesting combinations for other weapons as well (Dash + Quick Aim to land a shotgun blast being a favorite). Even more interesting effects happen when this is used with weapons that cost only 1 AP to use, such as most handguns and all PDWs, especially in combination with Rapid Clearance, as it nets 2 APs per kill. So a broken rapid clearance chain can be resurrected with a pistol kill, perhaps with an assist from a buddy.
 Master Marksman (passive) Accuracy with a proficient weapon is increased by 30% while there are no spotted enemies within 10 tiles
Currently the bonus to accuracy is not shown in the info panel, but it still applies as long as the conditions are met.
This skill is particularly useful as part of kitting out an operative for 'extreme' Combat#Accuracy, in combination with other buffs to accuracy, and not necessarily used with sniper weapons.
 Weak Spot (passive) Disabling a body part also remove that body part's armor
This is based in combination with another operative to make a heavily armored target extremely vulnerable.
 Mark for Death (4WPs), increases damage suffered by the target by 10 from each hit until the end of the turn.
This skill is very effective in multiplying damage to a target from burst weapons, especially shotguns and the Deceptor MG. The longer the burst (and the more bursts the target will receive) the more utility can be obtained from this skill.
However, it is not worth it to use it to increase the damage from single short weapons, like sniper rifles.
 Berserker
Berserker is essentially a meta-class. There is no reason at all to use Berserkers as melee fighters. It's probably the one thing they are actually bad at, and this is neatly reflected by their skill set.
 Armor Break (3WPs), next attack will shred an additional 30 armor.
Using this with a melee weapon is a very poor choice indeed:
First, the one advantage of melee weapons is that they have the highest damage per hit of any type of weapon, so they naturally overcome armor; if you are close enough to someone to hit them with a hammer, just club them to death and forget about the armor.
Second, even if for some reason you want to strip armor from the target while standing right next to it, don't do it with a melee weapon, because you have no idea what part you are going to hit and if it needs removing armor or not (remember, it is not possible to target body parts with a melee attack).
 Close Quarters Evade (passive) attacks from enemies within 10 tiles deal 25% less damage.
It's nice, being a passive skill, but it's not a game-changer by any stretch. Also, it doesn't encourage the use of melee weapons.
 Bloodlust (passive) Damage and Speed are increased proportionally to the health lost (up to double).
It doesn't matter how, or when the health was lost, so friendly fire and denial of health care are fair (meta) game.
If anything, this encourages to keep the berserker away from the action, indulging in the Bloodlust high from a safe distance with, say, a sniper rifle.
 Ignore pain (passive) Disabled body parts remain functional. Cannot Panic or be Mind Controlled.
This makes Berserkers particularly useful for dealing with Sirens and Terror Sentinels in Lairs but doesn't really encourage using them as melee fighters.
 Adrenaline Rush (5WP) All abilities cost 1 Action Point until the end of the turn, can't use any abilities that cost WPs after casting it, accuracy reduced by 50% and you are dazed the next turn.
The first thing to take into account is that you can still use abilities that cost WPs *before* casting Adrenaline Rush... Like Rapid Clearance, for example.
The second is that you can use weapons that cost 3 APs at the cost of 1AP, particularly Heavy Weapons (including the Grenade Launcher) and Sniper Rifles.
The penalty to accuracy can be negated by armor/augmentations, or by extreme mobility. This is what the number one Terminator Build amounts to: Berserker/Assault with the Strongman perk and top Speed, wielding a Deceptor. It can clear maps in one turn all by itself. (Yes, that's an 'it', because it's clearly not human).
Last but not least - what Adrenaline Rush doesn't do is anything to make Berserkers more interesting as melee fighters.
[quote="Yokes, post:5, topic:10746"] that combo of Evade, Bloodlust and Ignore Pain makes them good as tanks which with better armor may want to attract enemy hits. [/quote]
 Infiltrator
- Proficient with crossbows and spider drones (see complete list here)
- Gain +25% to stealth while undetected
Infiltrators are very versatile, their skill set allowing them to fulfill very different roles even without multiclassing.
To use infiltrators properly it's important to first understand how detection works.
Unlike with other operatives, you always know when the infiltrator is undetected because of the blue hue and the crossed-out eye on top of the screen when you select him (this icon  )
)
Though infiltrators are stealthy because of their training (as long as they are undetected, they get a +25% boost to stealth) and their class-specific 'styx' armor ( ,
, and
and  ), you can choose not to take advantage of it until they achieve a higher level, because their armor makes them squishy and they don't get a buff to their damage for attacking from stealth until they are LVL7 with the Sneak Attack skill.
Their starting  Eros CRB III crossbow is not a bad weapon - it does the damage and has the AP cost of the NJ pistol
  Iron Fury but has nearly three times the precision (effective range of 34 vs 14) and is also silent. The biggest drawback is the clip size (only 3 bolts).
The way I approach them, infiltrators have two defensive skills,  Deploy Decoy and
  Spider Drone Pack, and two offensive skills,
  Vanish and Sneak Attack, while their 'styx' armor is only really meaningful if they are used as scouts
 Surprise Attack (passive) Attacks from behind gain shock damage equal to 3 times the damage dealt.
The difficulty of taking advantage of this skill is that directional positioning in Phoenix Point is more accidental than intentional. However, it can be quite useful situationally, because it is one of the few ways of inflicting shock damage at a distance and dazing an enemy can be a life-saver (for example, to break mind control of a  Siren over an operative).
As the Eros CRB III has limited damage potential (it does 60 standard damage, thus 180 shock damage with this skill) it might require softening the target before it is effective, or use a weapon with a high damage per projectile (such as a sniper rifle.
 Deploy Decoy (4WP 1AP) Deploy holographic decoy at the chosen location. The decoy is treated as a real target by all enemies.
It can be a bit of a hit or miss because of enemy AI that can react to the decoy in unpredictable ways, sometimes ignoring it altogether. However, as a rule, if you place the decoy in a convenient spot and there are no more convenient targets for the AI, it will go after it.
 Spider Drone Pack (2AP) Deploy 3 Spider Drones with one action.
A great way to distract enemies by presenting them with three convenient targets. Though spider drones can also be used offensively, without the  Technician's
  Manual Control to control them directly, you can't use them on the same turn that you deploy them, and have to wait until next turn (as long as you have an active , you can manually control the spider drones, but if he dies, panics or evacs the AI will take over controlling them).
You can also use them for scouting, but beware of using them in  Lairs and
  Citadels as they can easily activate
  Terror Sentinels, and their psychic scream affects every operative in a 24 tile radius.
 Vanish (4WP) Move within 5 tiles and disappear from view for the next turn (or until spotted).
Combined with Sneak Attack, it is one of the easiest and most reliable ways of doing extreme damage.
To benefit from the buff must remain undetected at the time of the , and the best way to achieve this is by casting . It's the only way to achieve it if you want the infiltrator to use melee weapons, because no matter his stealth he will be detected when getting close to enemies (at a distance of 5 tiles, to be precise).
 Sneak Attack (passive) Damage dealt while not spotted is increased by 100%.
This applies to any damage dealt by the operative with any attack but not to Damage over Time (DoT) effects. So, for example, the  Psyche CRB IV will deal
  100 (because 50 increased by 100%), but will continue to inflict
  40, not 80. However, all other special damages besides DoT will be increased by 100%. So, for example,
  Blast Damage, or the Mind Crush attack, will be increased by 100%.
Technician
- Proficient with PDWs, Auto Turrets and Exo-Arms (see complete list here)
need corrections
one interesting multiclass is infiltrator/technician, clad in stealth armor (so no exo-arms). He can scout ahead, remaining undetected, and leave a turret, or two, closer to the enemies than to your team.
Turrets (as well spider drones and turret vehicles) can be controlled several times by different soldiers and the 600 pts of damage that the laser turret can deliver per attack at the cost of 1AP and 3WPs is *a lot*.
 Fast Use (passive) The action point cost of medkits, stimpacks and robotic arm abilities is reduced by 1.
This is mostly for dedicated healers.
Manual Control (3WP 1AP) Take manual control of a turret or vehicle weapon and shoot at a target.
Devastating when used with any auto turret, particularly a  Scorcher AT, as it has an unmatched DPS of 600 per a single AP.
Can also be used with spider drones to quickly explore the map during the first turn and/or a precision explosive.
does not receive any benefits or rewards from the killing down by the spider drones, vehicle or auto turrets, such as WPs, APs (if multiclassed and using rapid clearance) or XPs.
Can't be used to make  Scarab shoot more than once per turn. All rocket weapons are hard-coded to be used only once per turn
 Field Medic (2WP 2AP) Restore 10 hit points and 10 armor to all body parts of the selected target. Disabled body parts are restored.
Requires  VVA-2 Exo Arms and costs one charge (ammo).
One of two only ways for the player to restore disabled non-augmented limbs in combat (the other is  Aspida.
 Remote deployment (1AP) Turrets can be thrown and deployed for 1 action point.
 Electric reinforcement (6WP 1AP) Give yourself and allies within 20 tiles a bonus of 20 armor for 1 turn. This effect does not stack.
 Priest
- Proficient with viral weapons,  The Redeemer and
  The Subjugator
- Can use special head mutations.
The Priest is focused on decreasing enemy WPs (using Viral weapons and Psychic Scream) and taking advantage of it (Mind Control and Panic). He also has an area of effect attack that can be metaed into something wicked (Mind Crash), and what can be best described as a combined haste & bravery spell (Frenzy).
There is a defensive-support side to the Priest, with Psychic Ward ("Allies within 10 tiles are immune to panic and psychic damage attacks").
Then there is also the Mind Sense passive skill ("All organic enemies within 15 tiles are automatically revealed"), but in Phoenix Point you don't need to be a psychic to spot most enemies much further away.
A particularity of Priests is that they have access to a different set of head Mutations, each of them adding another "spell" to their repertoire:
- Judgment Head: Instils Frenzy in friendly characters within 20 tiles for 2 turns, increasing their Speed by 50% and making them immune to panic
- Screaming Head: Scream, reducing Will Points of all enemy units in an 8 tile radius.
- Synod Head: Living allied units within 7 tiles recover 2 Will Points at the start of the turn.
However, the Judgement Head and the Frenzy spell that comes with it are the best choices by far in most circumstances. A 50% increase in speed and immunity to panic for 2 turns? Any of these effects would have been enough to make it a worthwhile investment, but together it's a no-brainer.
- How do Viral weapons work? Whenever a projectile from a Viral weapon inflicts any damage on the target, it also suffers a set amount of viral damage. The total amount of viral damage incurred by a character is subtracted from his pool of WPs at the beginning of its turn. The takeaway is that some damage must be inflicted with the weapon for the target to incur viral damage, meaning that the armor has to be overcome and that you have to wait until the enemies turn for the viral damage to take effect. This means that you can't use Viral weapons to reduce the WPs of an enemy to lower the cost of Mind Controlling it on the same turn or to Panic it.
- How to use Mind Control effectively.
The cost in WPs of initiating Mind Control of an enemy is its current WPs and the cost of maintaining MC on each subsequent turn varies on the type of character (1WP for worms, 2WPs for Arthrons and Humans, 3WPs for Tritons, 5WPs for Sirens and Chirons, and 10WPs for Scyllas).
- Beware that
- if casting MC will lower your WPs to 0, you will lose the WPs and fail to MC the enemy;
- if the enemy is panicked, you can MC them but they can't do anything;
- while under MC the enemy is for all intents and purposes on your team, which means that it will gain WPs from Inspire and from killing enemies.
So what you want to do is reduce the WPs of your target before casting MC, and you want to start by reducing its max WPs by disabling its head. You will probably want to bring the WPs even lower by, for example, casting Psychic Scream, or killing some of its mates to bring down the morale. You don't want to reverse the order because if you first kill some enemies, or cast Psychic Scream, and then disable the target's head, the reduction in max WPs will absorb those initial losses and you will not lower the cost to MC.
All this means that with MC you want to carefully plan ahead and do some math before you pick a victim.
Finally, don't forget that you can release the critter from MC if it is convenient for any reason (for example, to avoid paying the cost of maintaining MC next turn, or because you want its water... I mean, WPs for dispatching it).
- Tuning the Mind Crush
Initially, Mind Crush does 100 damage to all enemies in a 10 tile radius. That is enough to kill all kinds of worms (though not mindfraggers), and do considerable damage to humans, Arthrons and Tritons, but you can stack it with Reckless or Sneak Attack to give it a more murderous touch. Or you can cross the Priest with a Heavy for the ultimate crowd control experience. Or with assault to gain Rapid Clearance. I haven't used any of these meta-Mind Crush builds in a long while, so if anyone has more recent experience with them, please do share it!
 Mind Control (WP cost equal to enemy's current WP, 1AP) Gain control of an enemy. Costs 1-10 WPs per turn to maintain, depending on target type.
 Induce Panic (3WP, 1AP) Cause a target to panic if its current will points are less than the Priest's.
 Mind Sense (passive) All organic enemies within 15 tiles are automatically revealed.
 Psychic Ward (passive) Allies within 10 tiles are immune to panic and psychic damage attacks. check
 Mind Crush (6WP, 1AP) Deal 100 damage to all enemy entities within 10 tiles.

